


DevOps & CI/CD are buzz word for a while now and they have really proven their value in todays' fast moving world and Agile development process. One understands the true value only when they have actually been a process of it and see for themselves the immense amount of time and headache it saves.
At Royale Cheese initially we had setup CI/CD for iOS via Microsoft's Visual Studio App Center, but last year they declared the retirement of MBaas which got us worried about the overall future of VS App Center. That was one of the reasons we wanted to switch away from it. Secondly, the free tier provided around 400 minutes of build time per month per account which would had been sufficient for other technologies, but iOS takes around 15 minutes to create a single build and deploy. So having multiple apps (both iOS and Android) in the same account didn't fare well.
We were already using Azure DevOps for CI/CD for other technologies and it seemed promising. It's future plan had no issues of shutting down and it provided around 1800 minutes of free build time. We decided to give it a try and so far don't have any complaints. We have started loving and adoring Azure DevOps and hope it stays this way.
Alright! Enough with the issues, let's see how we can get the build & deployment going.
Prerequisites
- Paid Apple developer account, an app added to appstoreconnect.apple.com & an identifier added to the developer account.
- Azure DevOps account and an iOS repository created
- fastlane installed locally (for generating session token)
Since for iOS CI and CD are two separate and lengthy processes we will divide the tutorial in two parts. Part 1: Continuous Integration and Part 2: Continuous Deployment
Continuous Integration
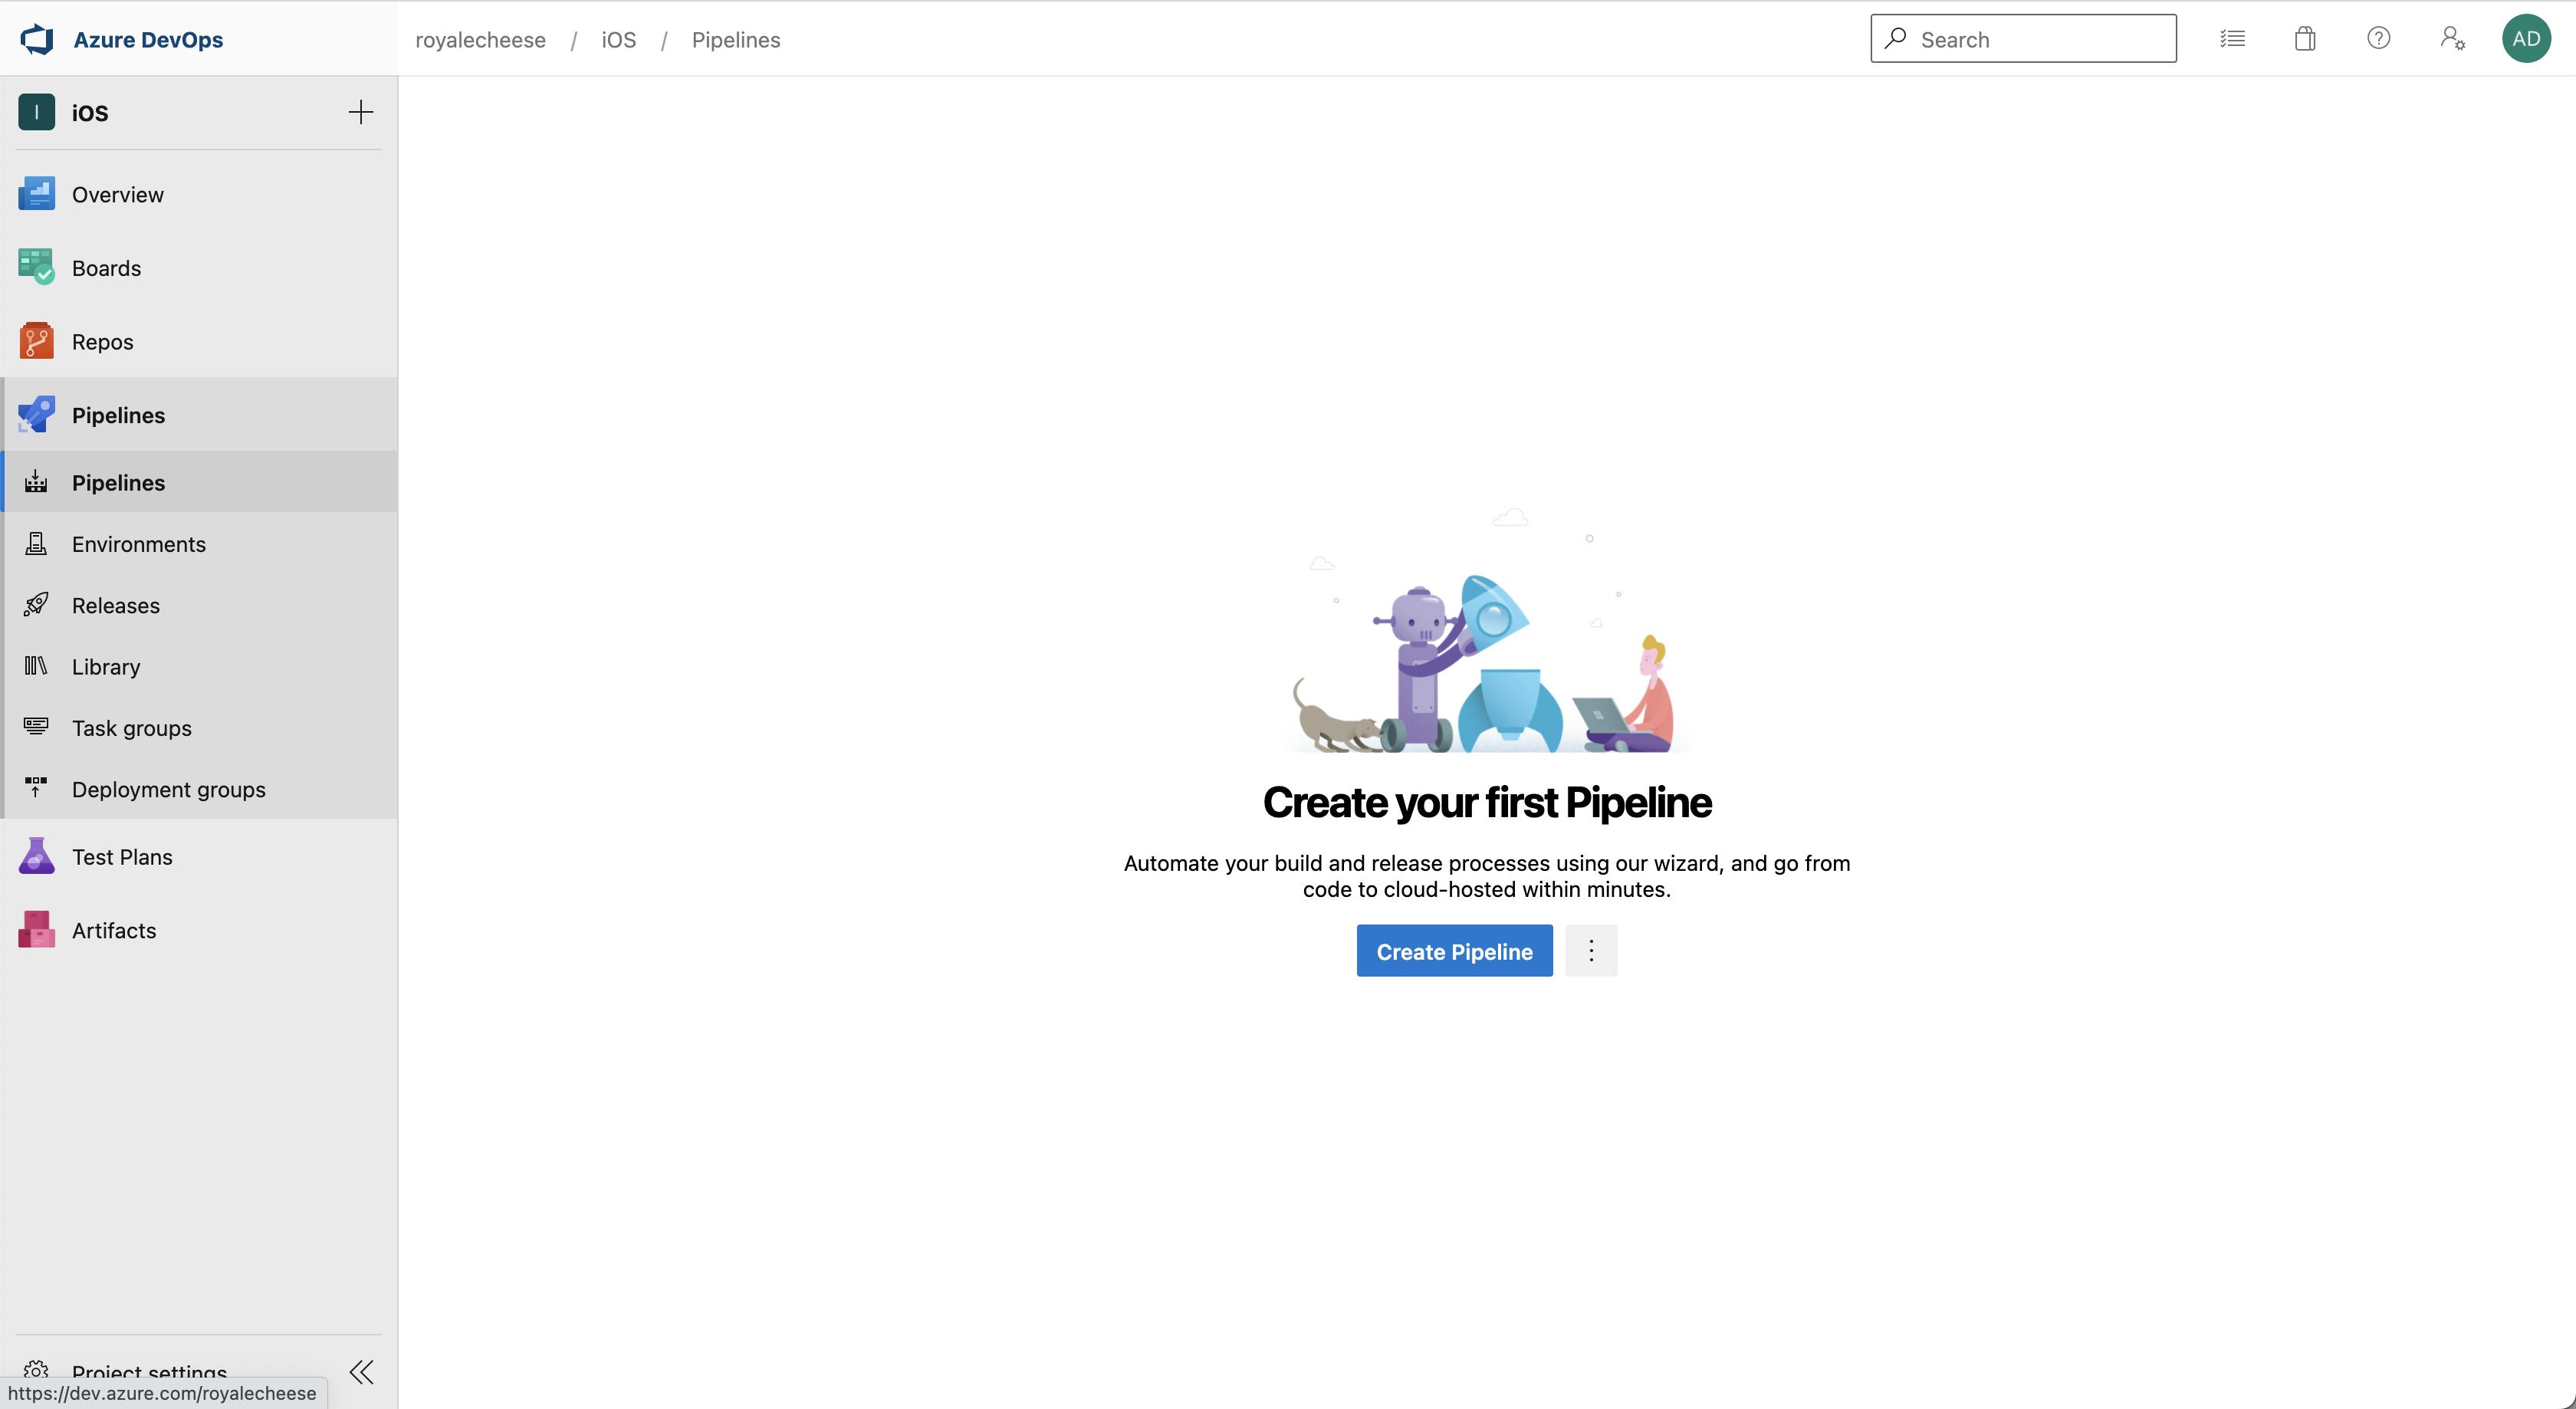
Let's start with CI part of CI/CD. In this section we will create a build using the pipeline feature. For demo purposes I have created a project named 'iOS' in Azure DevOps. Open your project and navigate to "Pipelines" on the left panel as in the screenshot below.
Click on "Create Pipeline" which will open the below page.
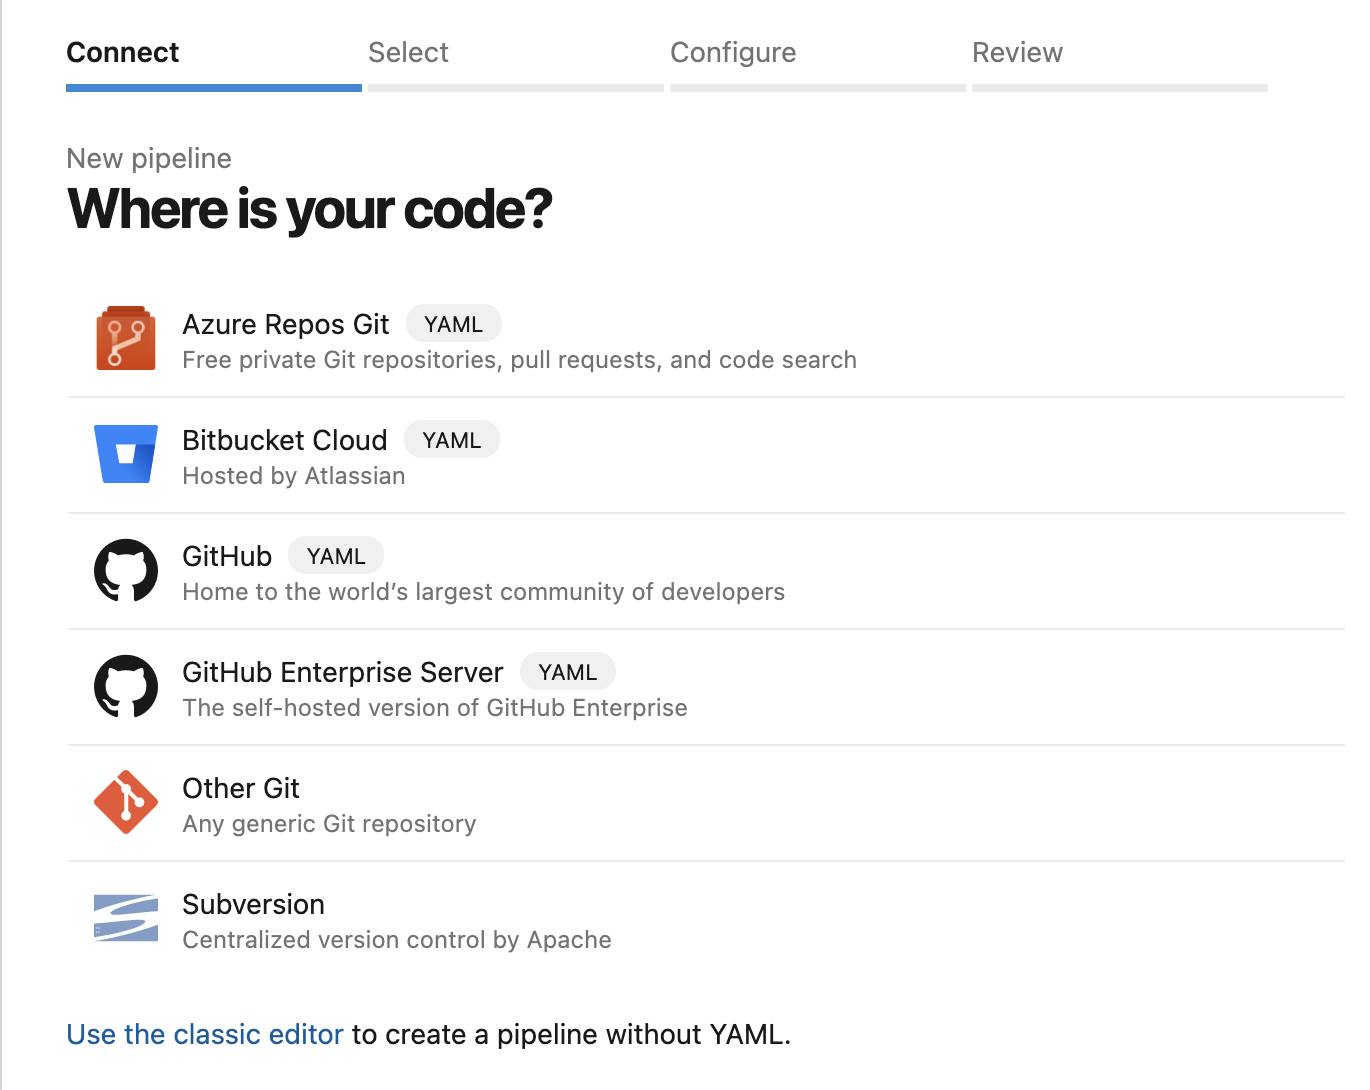
Here we are going to select "Use the classic editor" which is easier than the other options. The other options will eventually lead to writing yml files for configuring your pipelines.
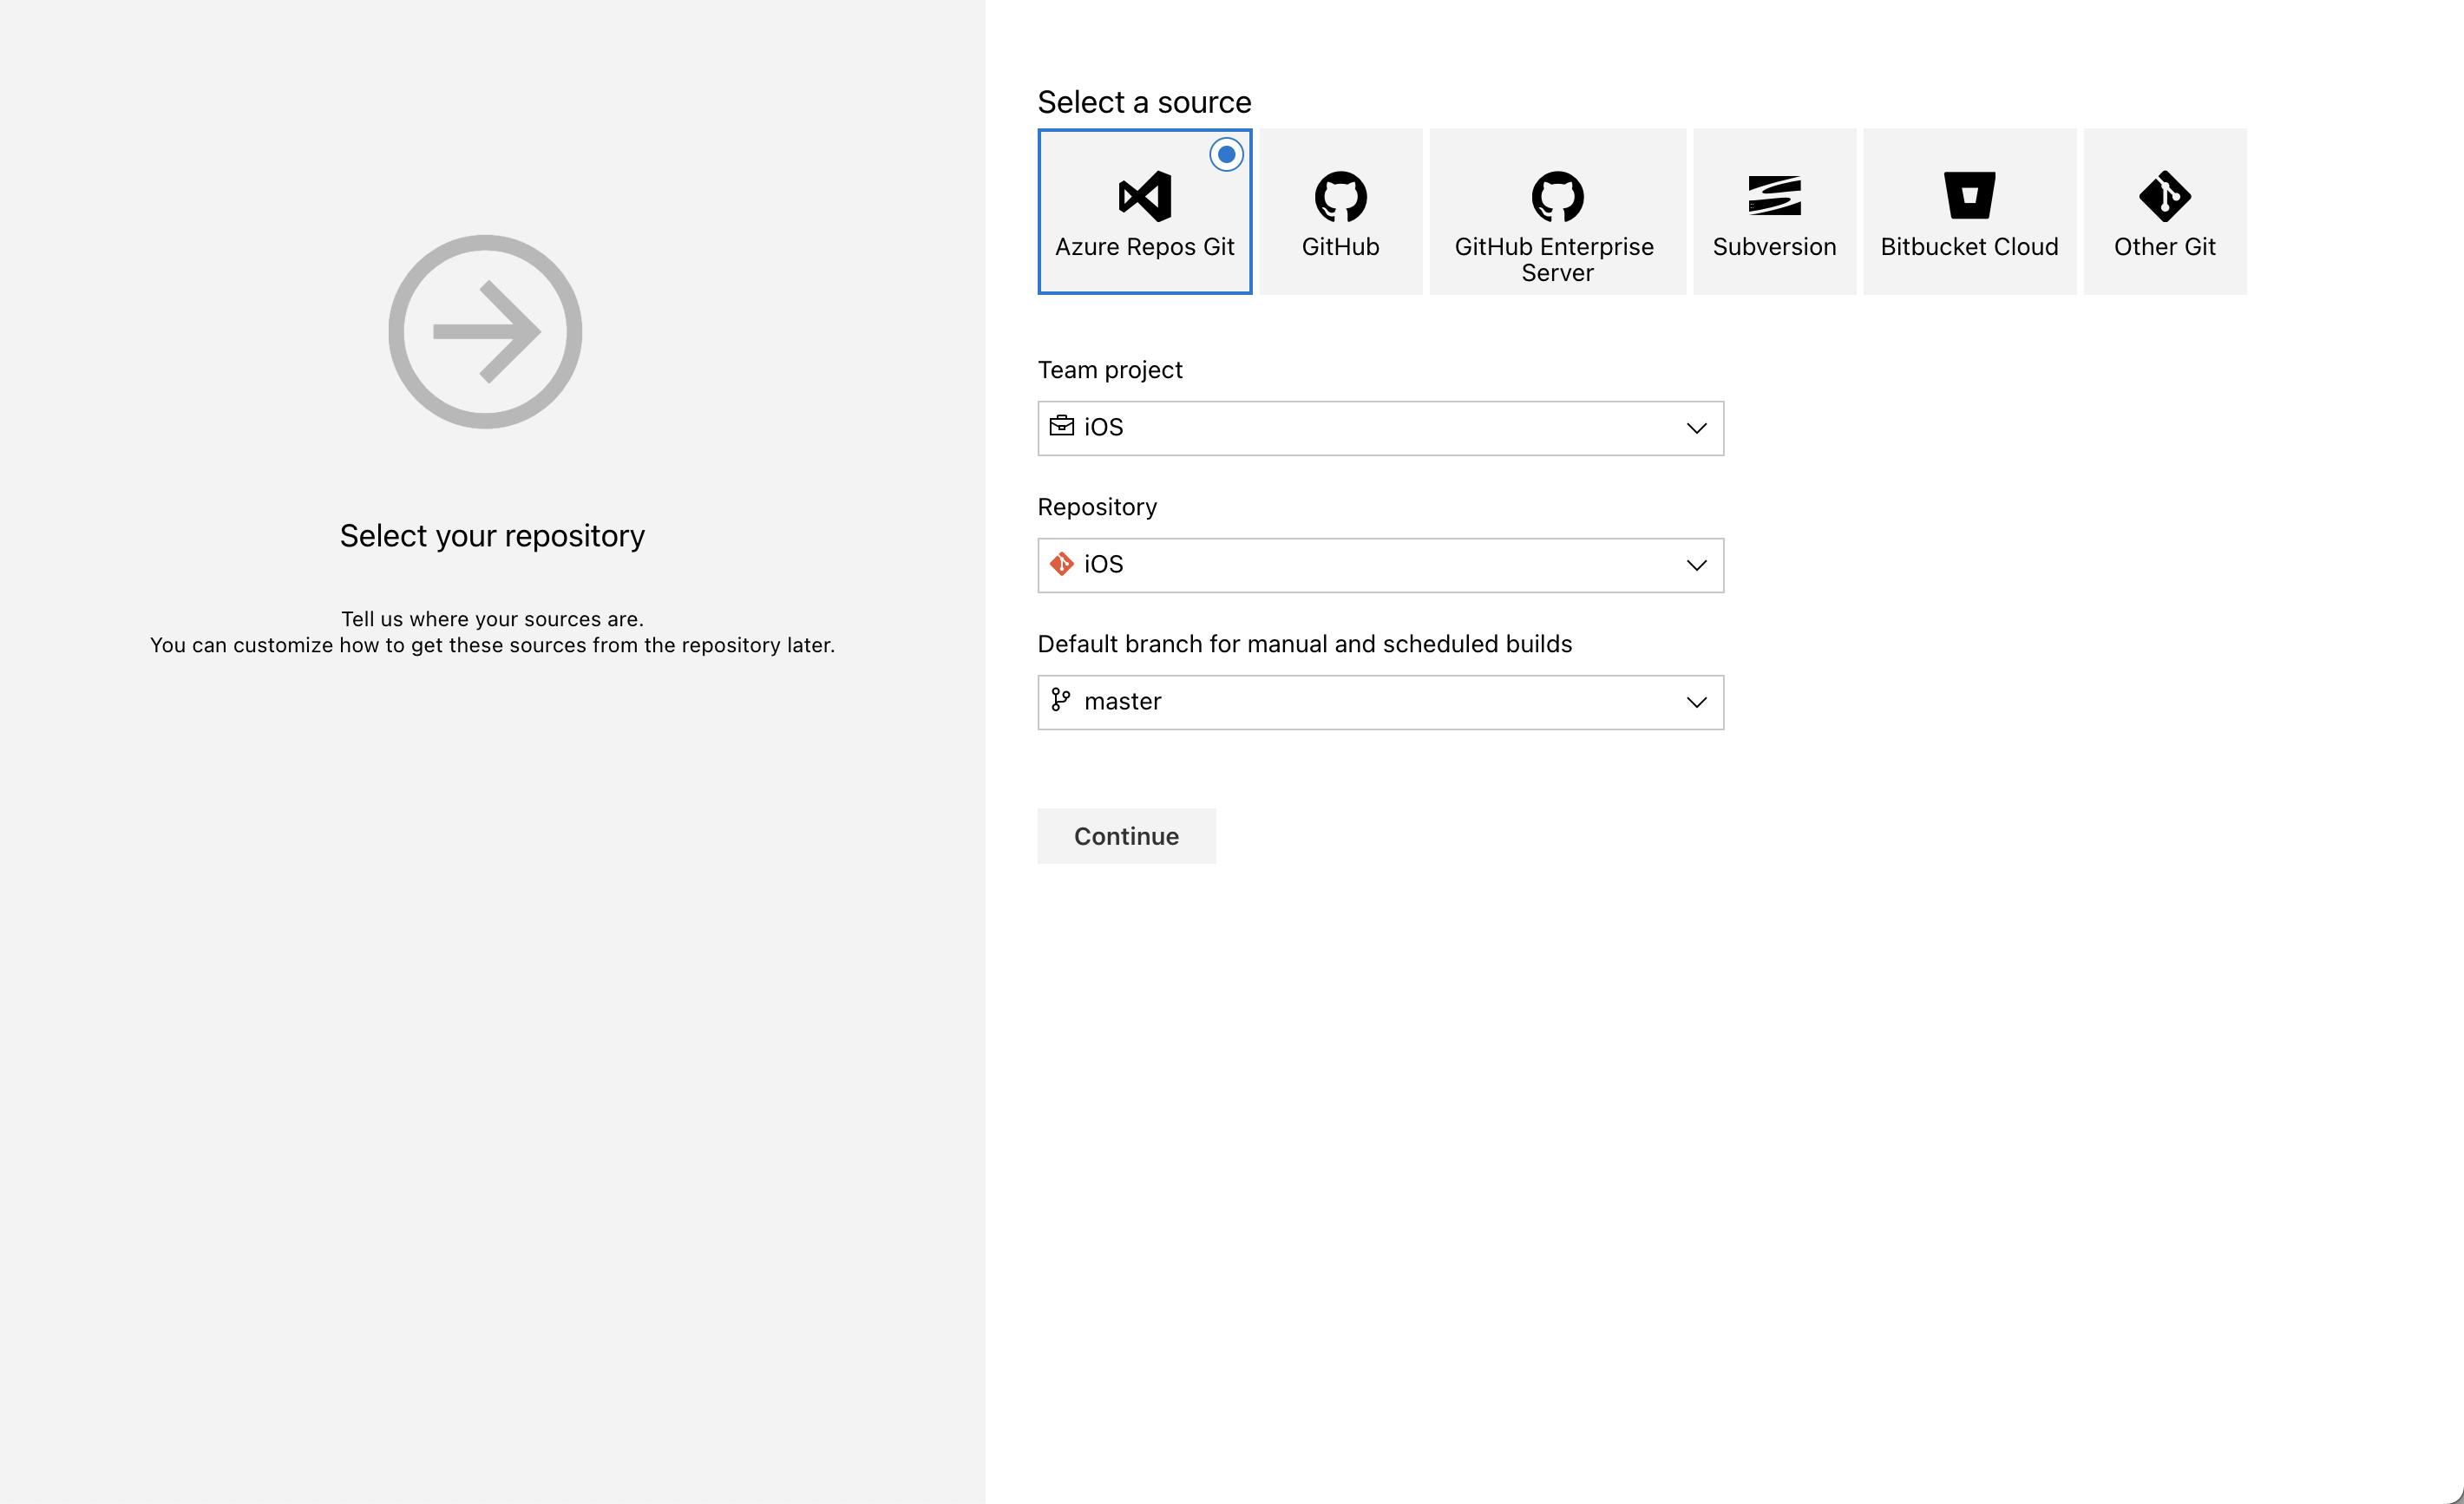
Select your branch from you which you want to ru the build.
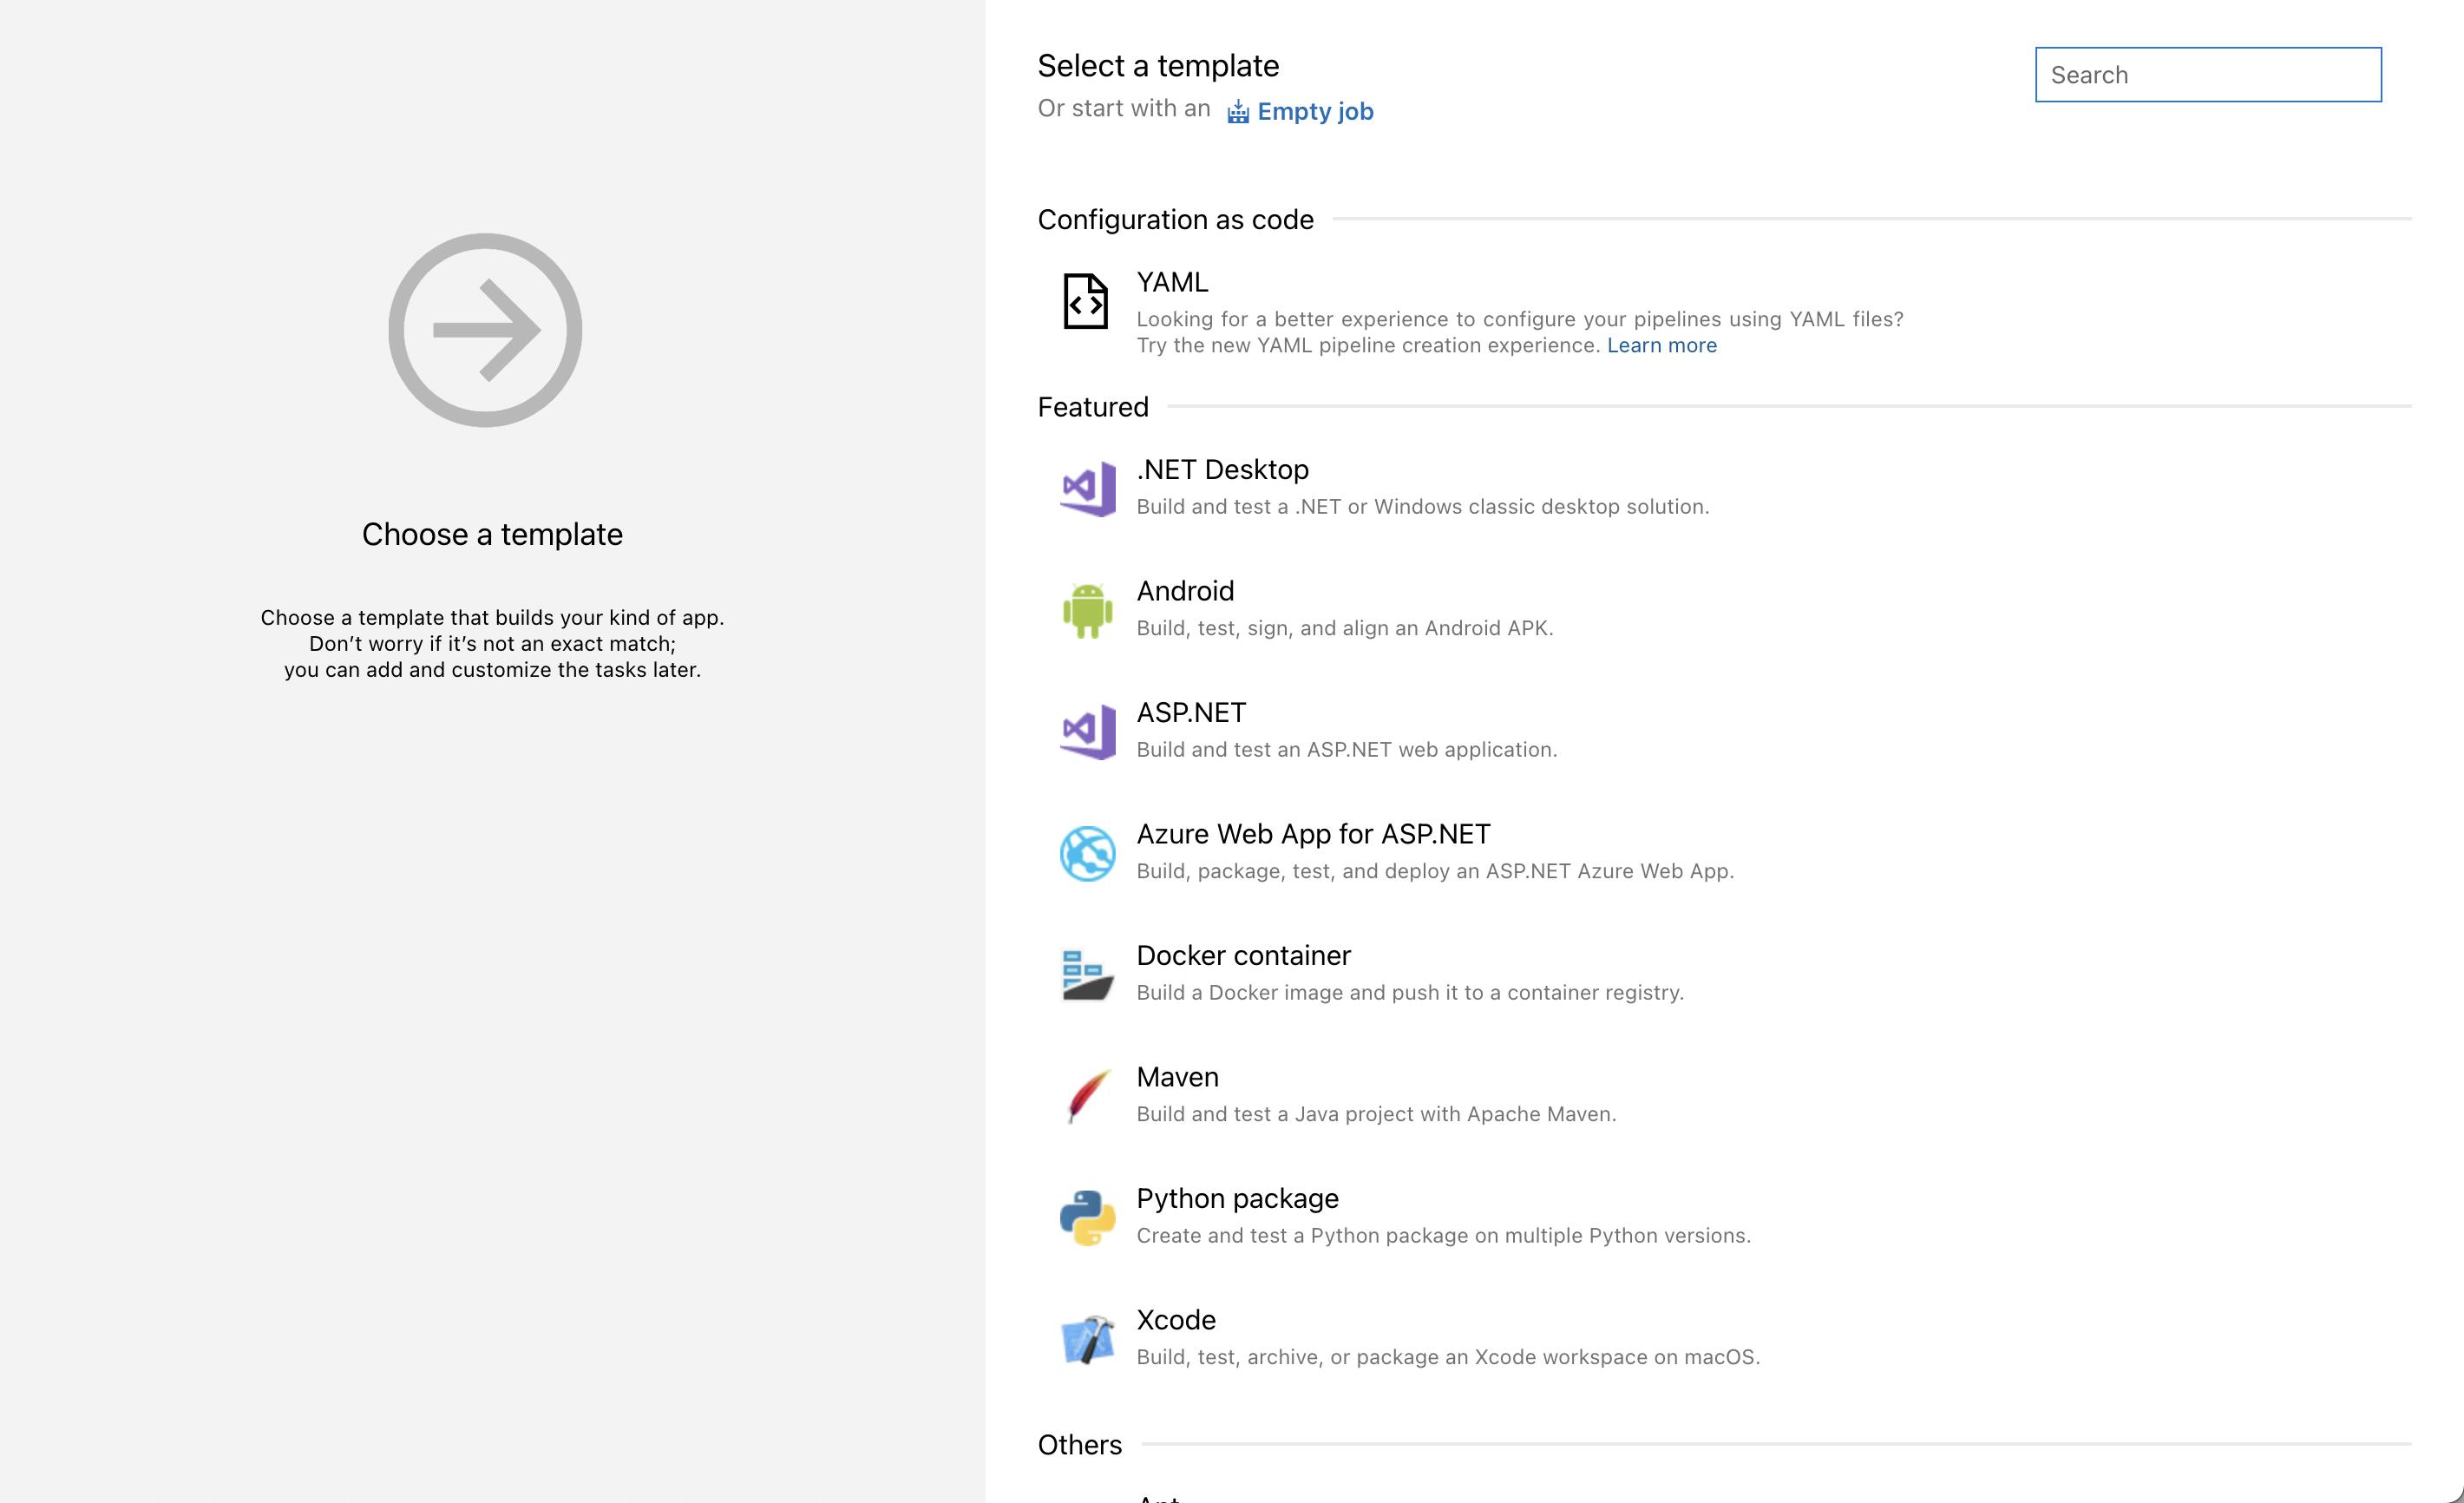
Select "Xcode" from the list of featured items and click Apply.
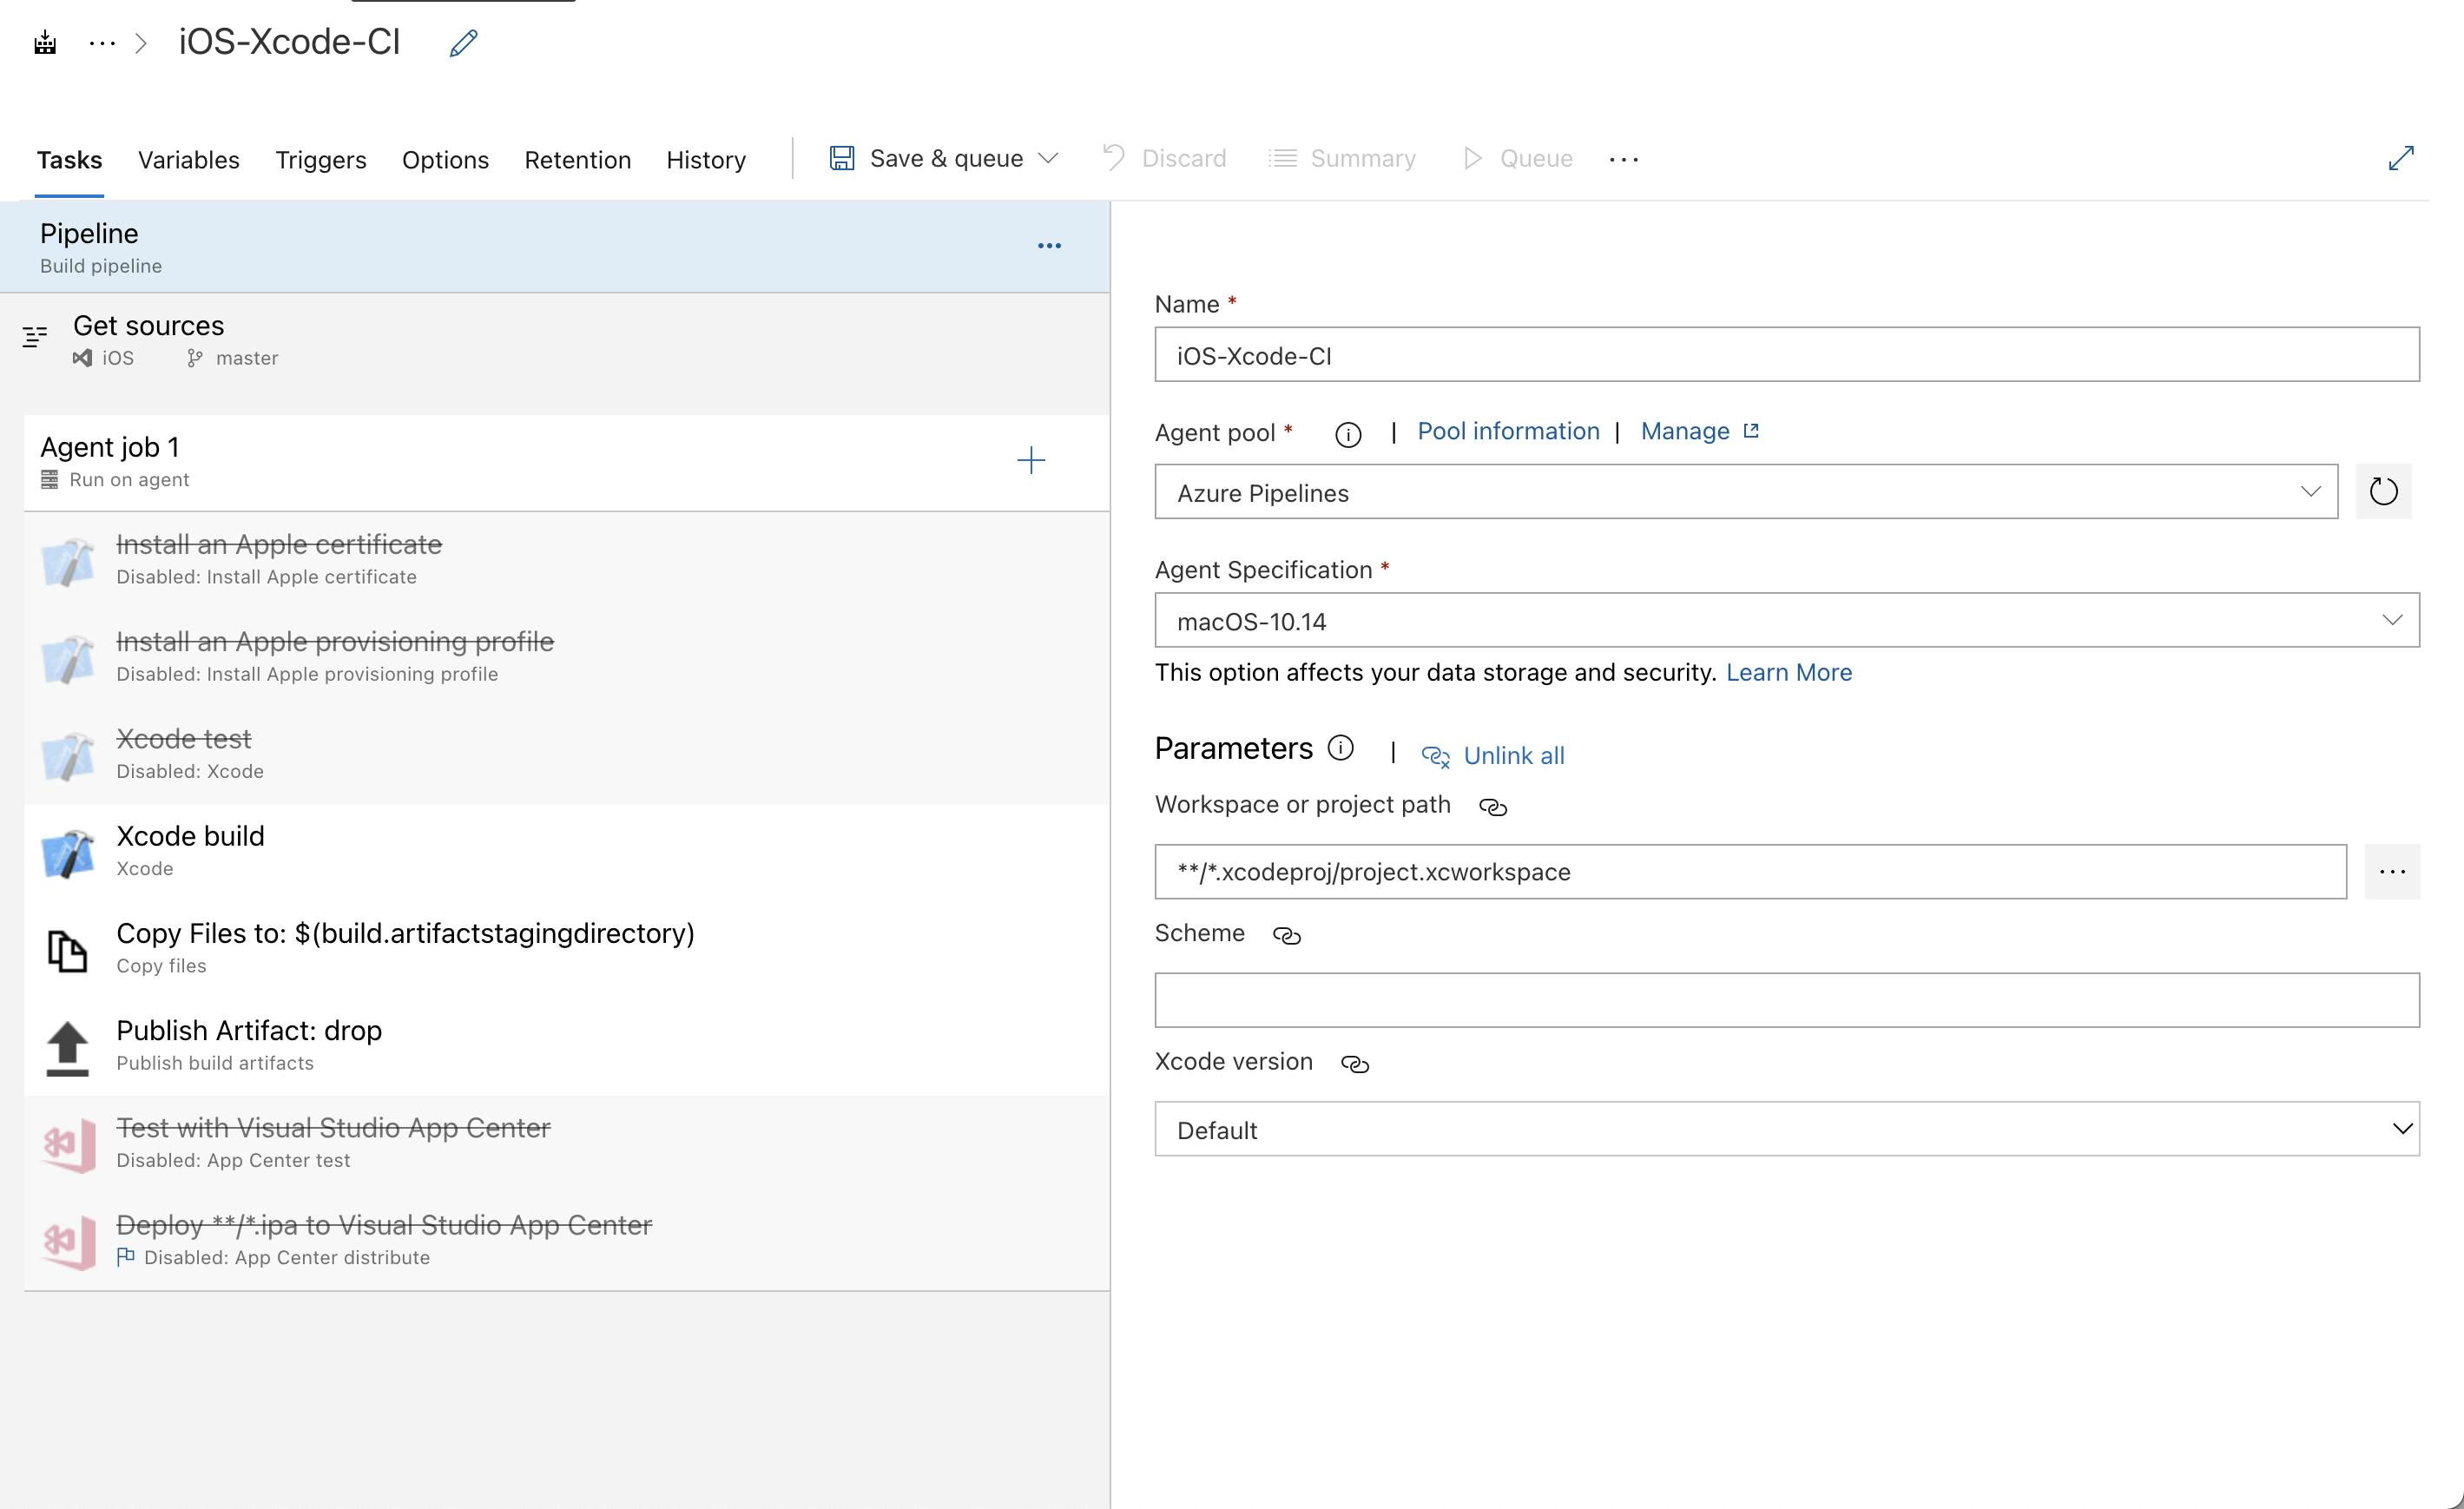
This will automatically create a build configuration with some basic settings, but we are still a long way. For simplicity we are not going to use "Xcode test" so you can right click on it and select "Remove selected tasks". Also since we are not going to use VS App Center you can remove those tasks as well. We will be distributing our app on TestFlight. So enable the Apple Certificate & Apple Provisioning Profile tasks. It will show some error but we will get there. Our pipeline page will look like below.
Apple Certificate
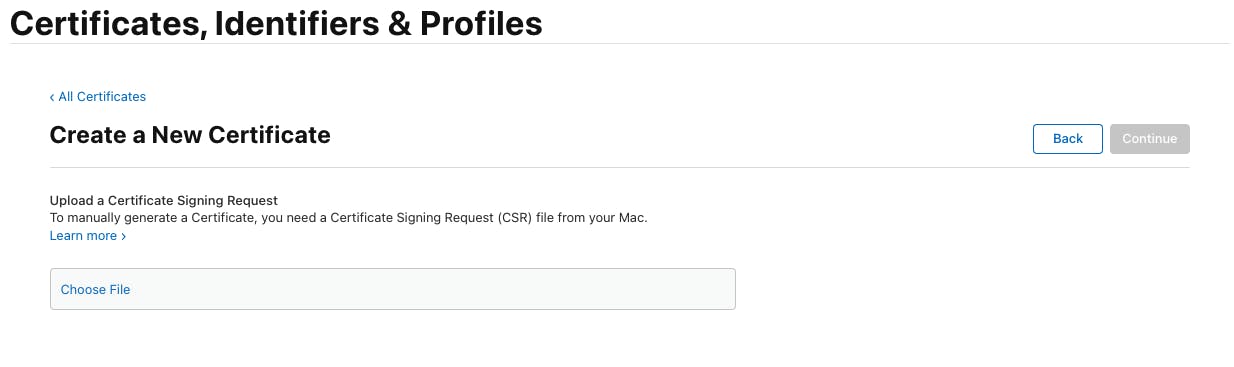
Let's get the Apple .p12 certificate which is used for signing the build. On your Mac open Keychain app and in the top bar select Keychain Access -> Certificate Assistant -> Request a Certificate from Certificate Authority... Enter the information for the certificate and select "Saved to disk" and continue. It will ask you to save a CertificateSigningRequest.certSigningRequest file. Save it some place accessible on your machine.
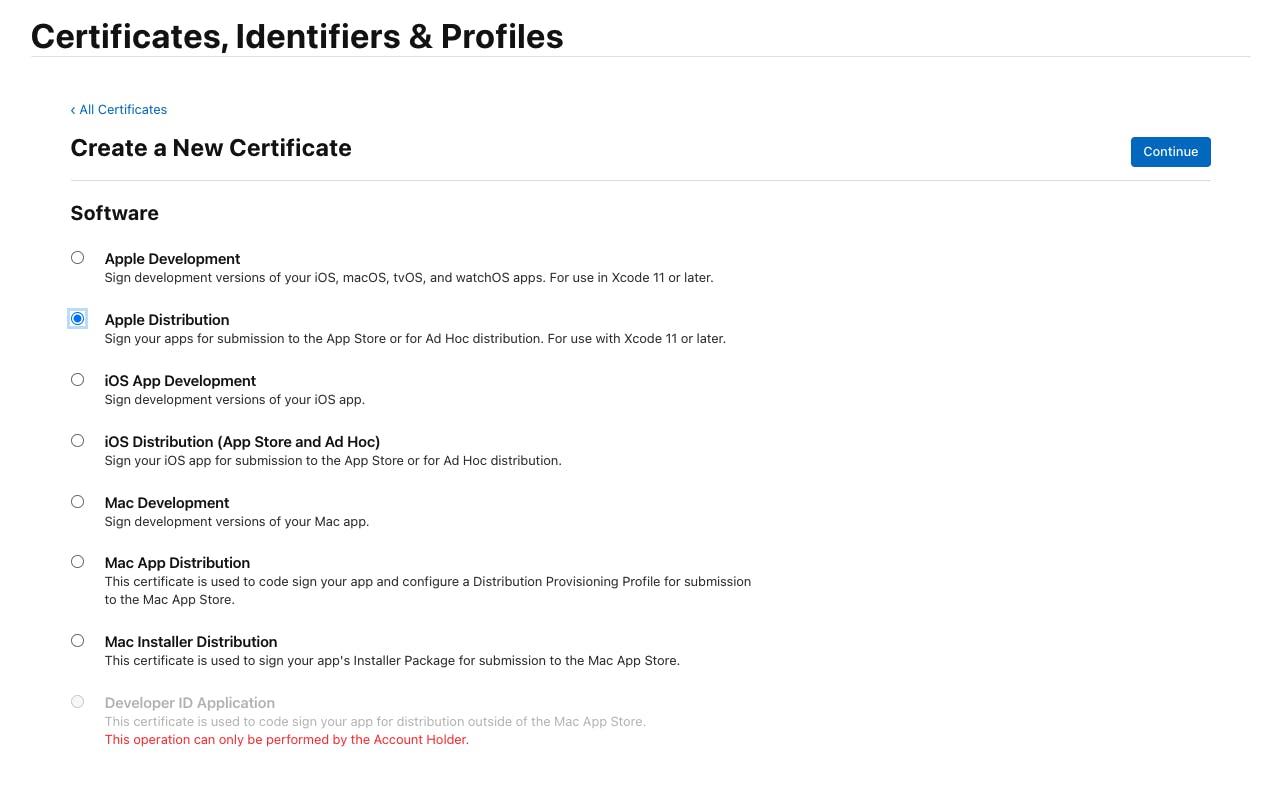
We will now add it the above generated file in your apple account. Visit this page from where we will be adding the certificate. Select "Apple Distribution" and continue. The next two pages are self explanatory (see the screenshots below).
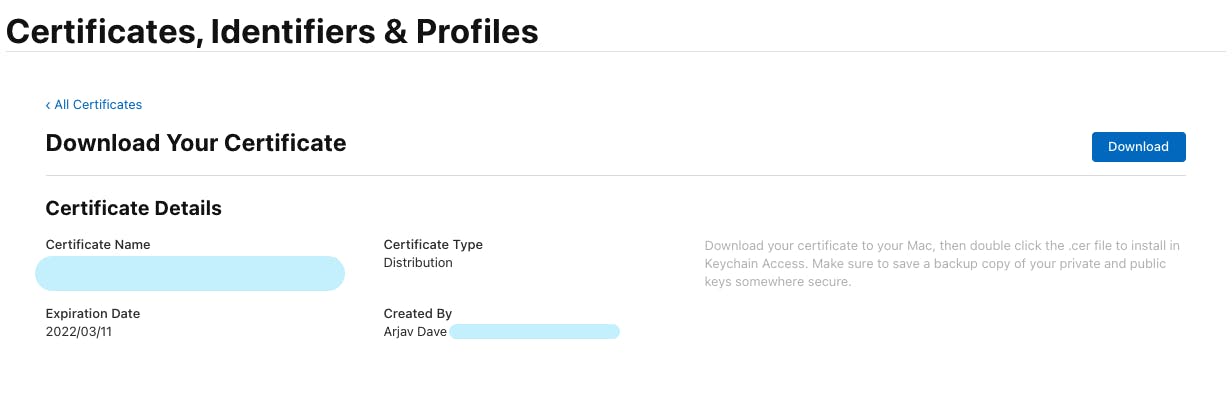
Download the certificate file as "distribution.cer". Click on this file which will open the Keychain access and add the certificate file to your Keychain. You can find an entry "Apple Distribution: Your account name" in your Keychain certificates.
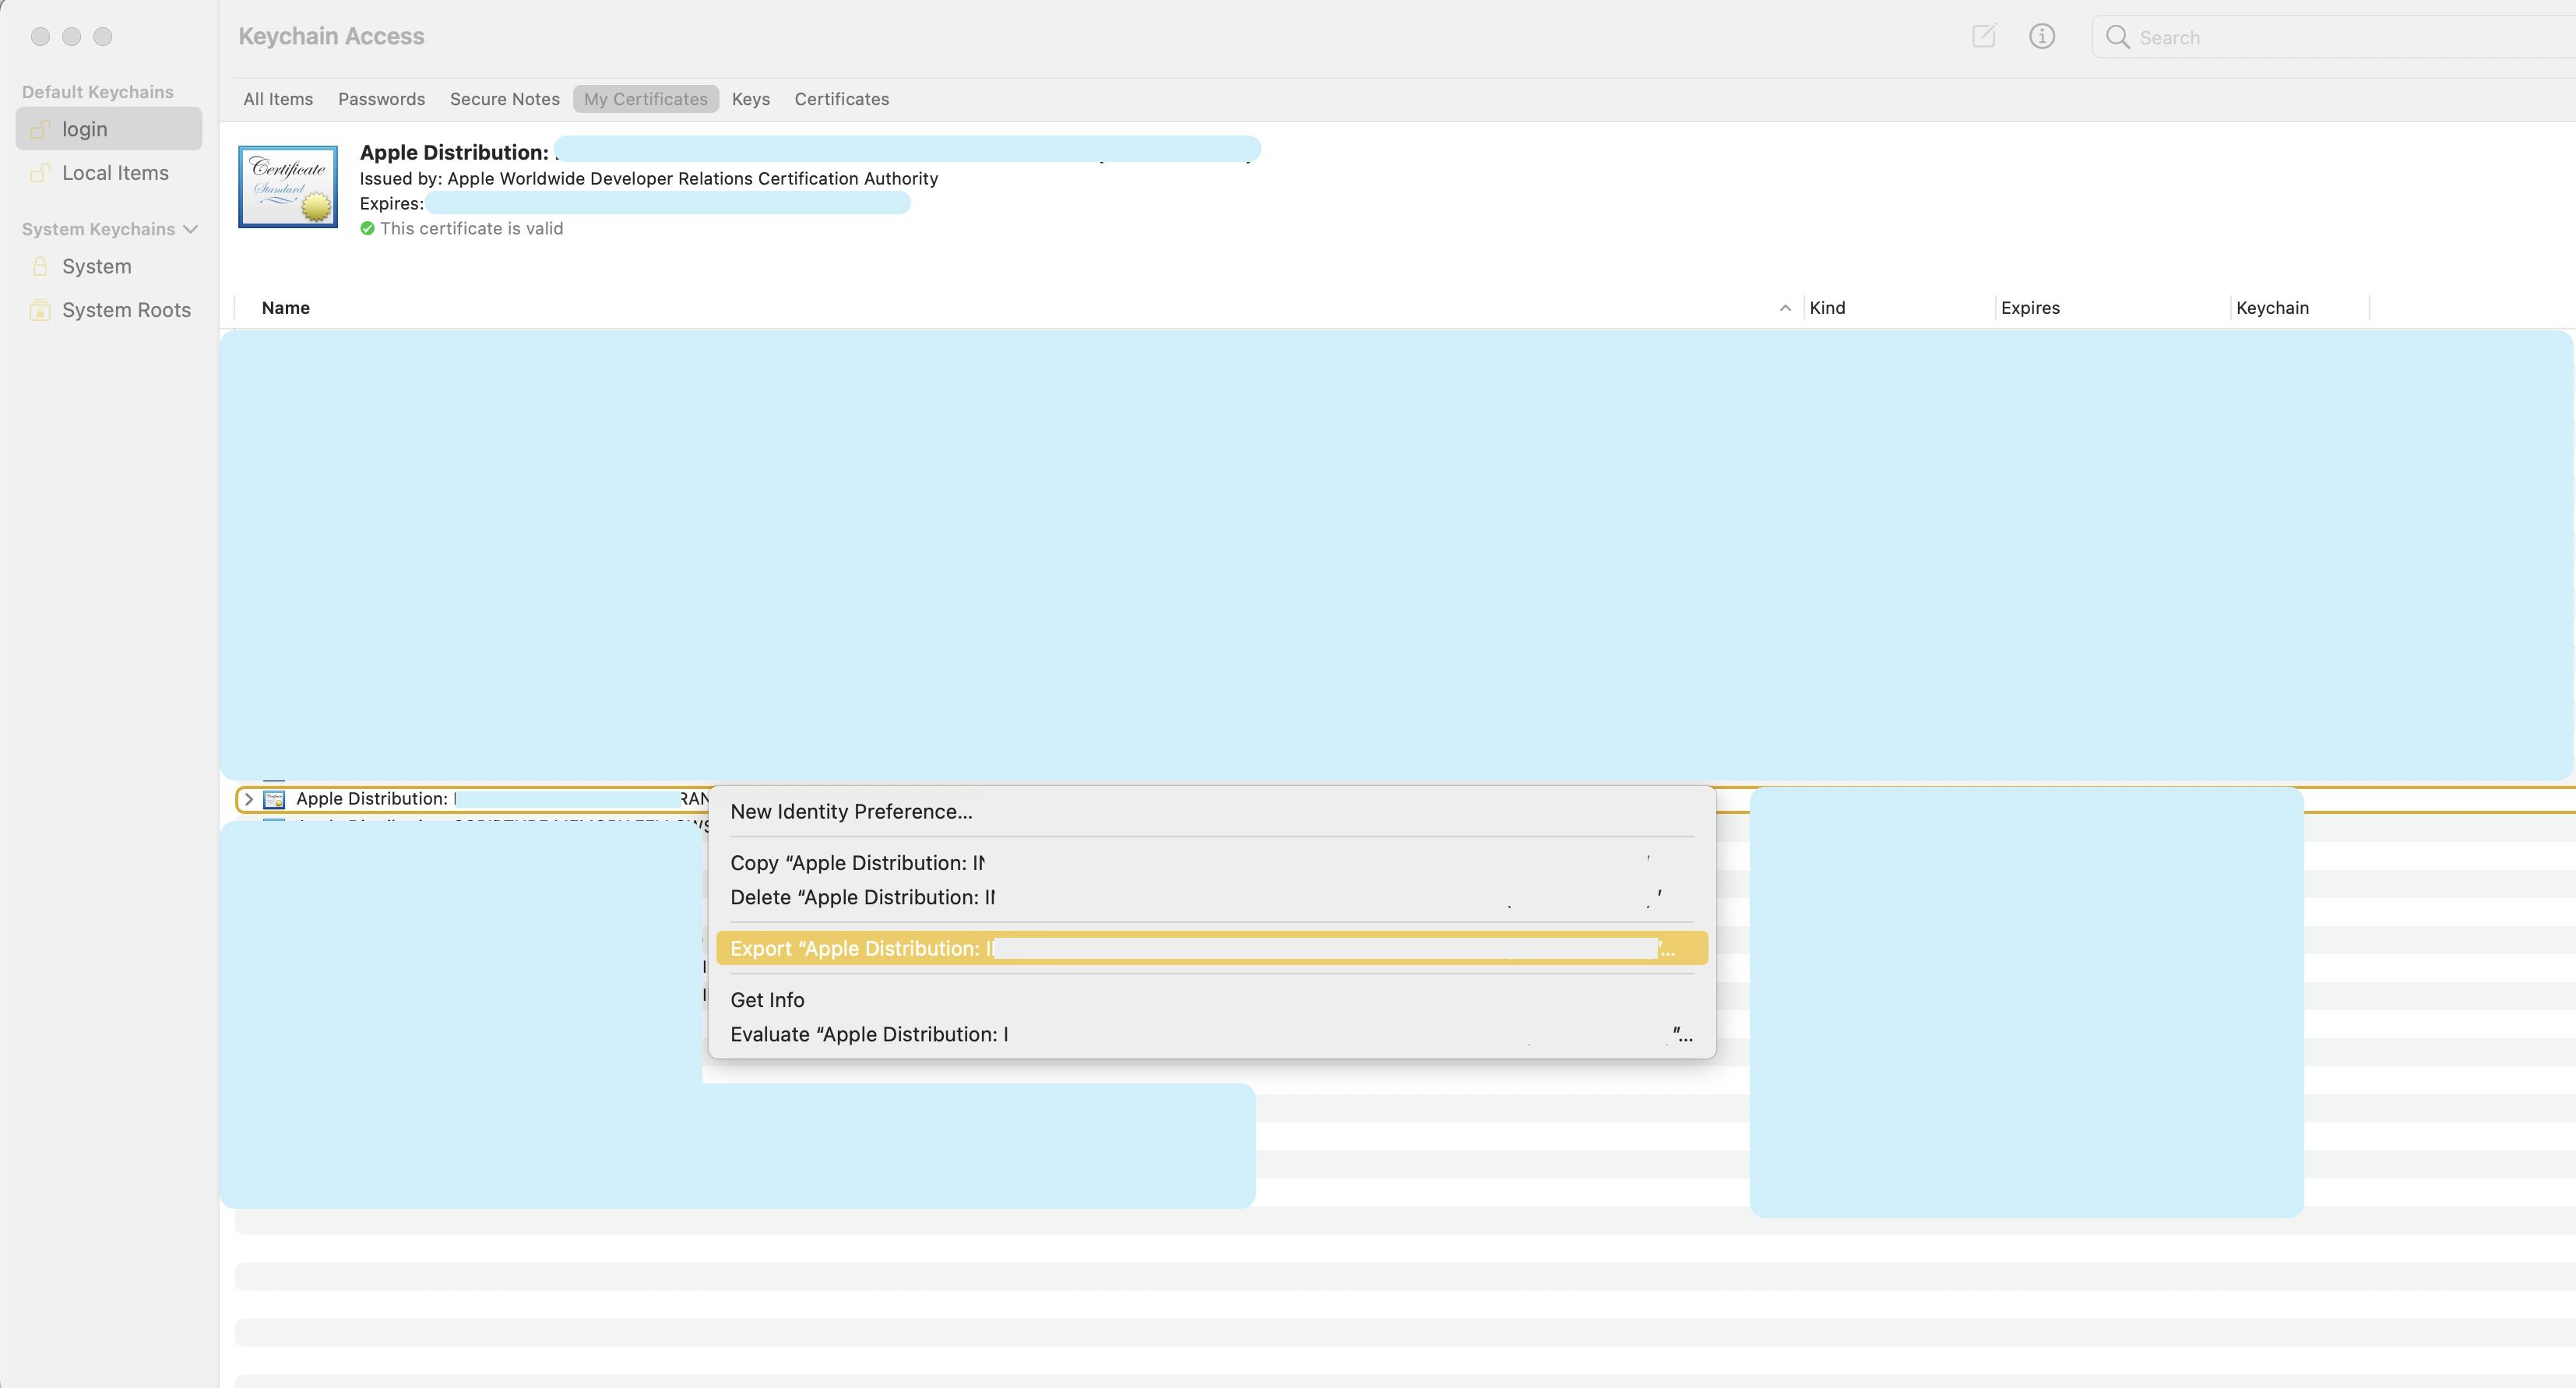
Right click on it and select "Export "Apple Distrubtion: name". Save the file as .p12 with a strong password. We have successfully generated the .p12 file required for signing the build.
Apple Provisioning Profile
For this you need to have an identifier added to your developer account. Check prerequisites. Visit your profiles and create a new profile. Select App Store in the distribution section and continue. Select your App ID and continue. Select the certificate which we uploaded in the above step and click continue. Enter the name of your provisioning profile and click "Generate". This will download the provisioning profile on your machine.
Back to DevOps
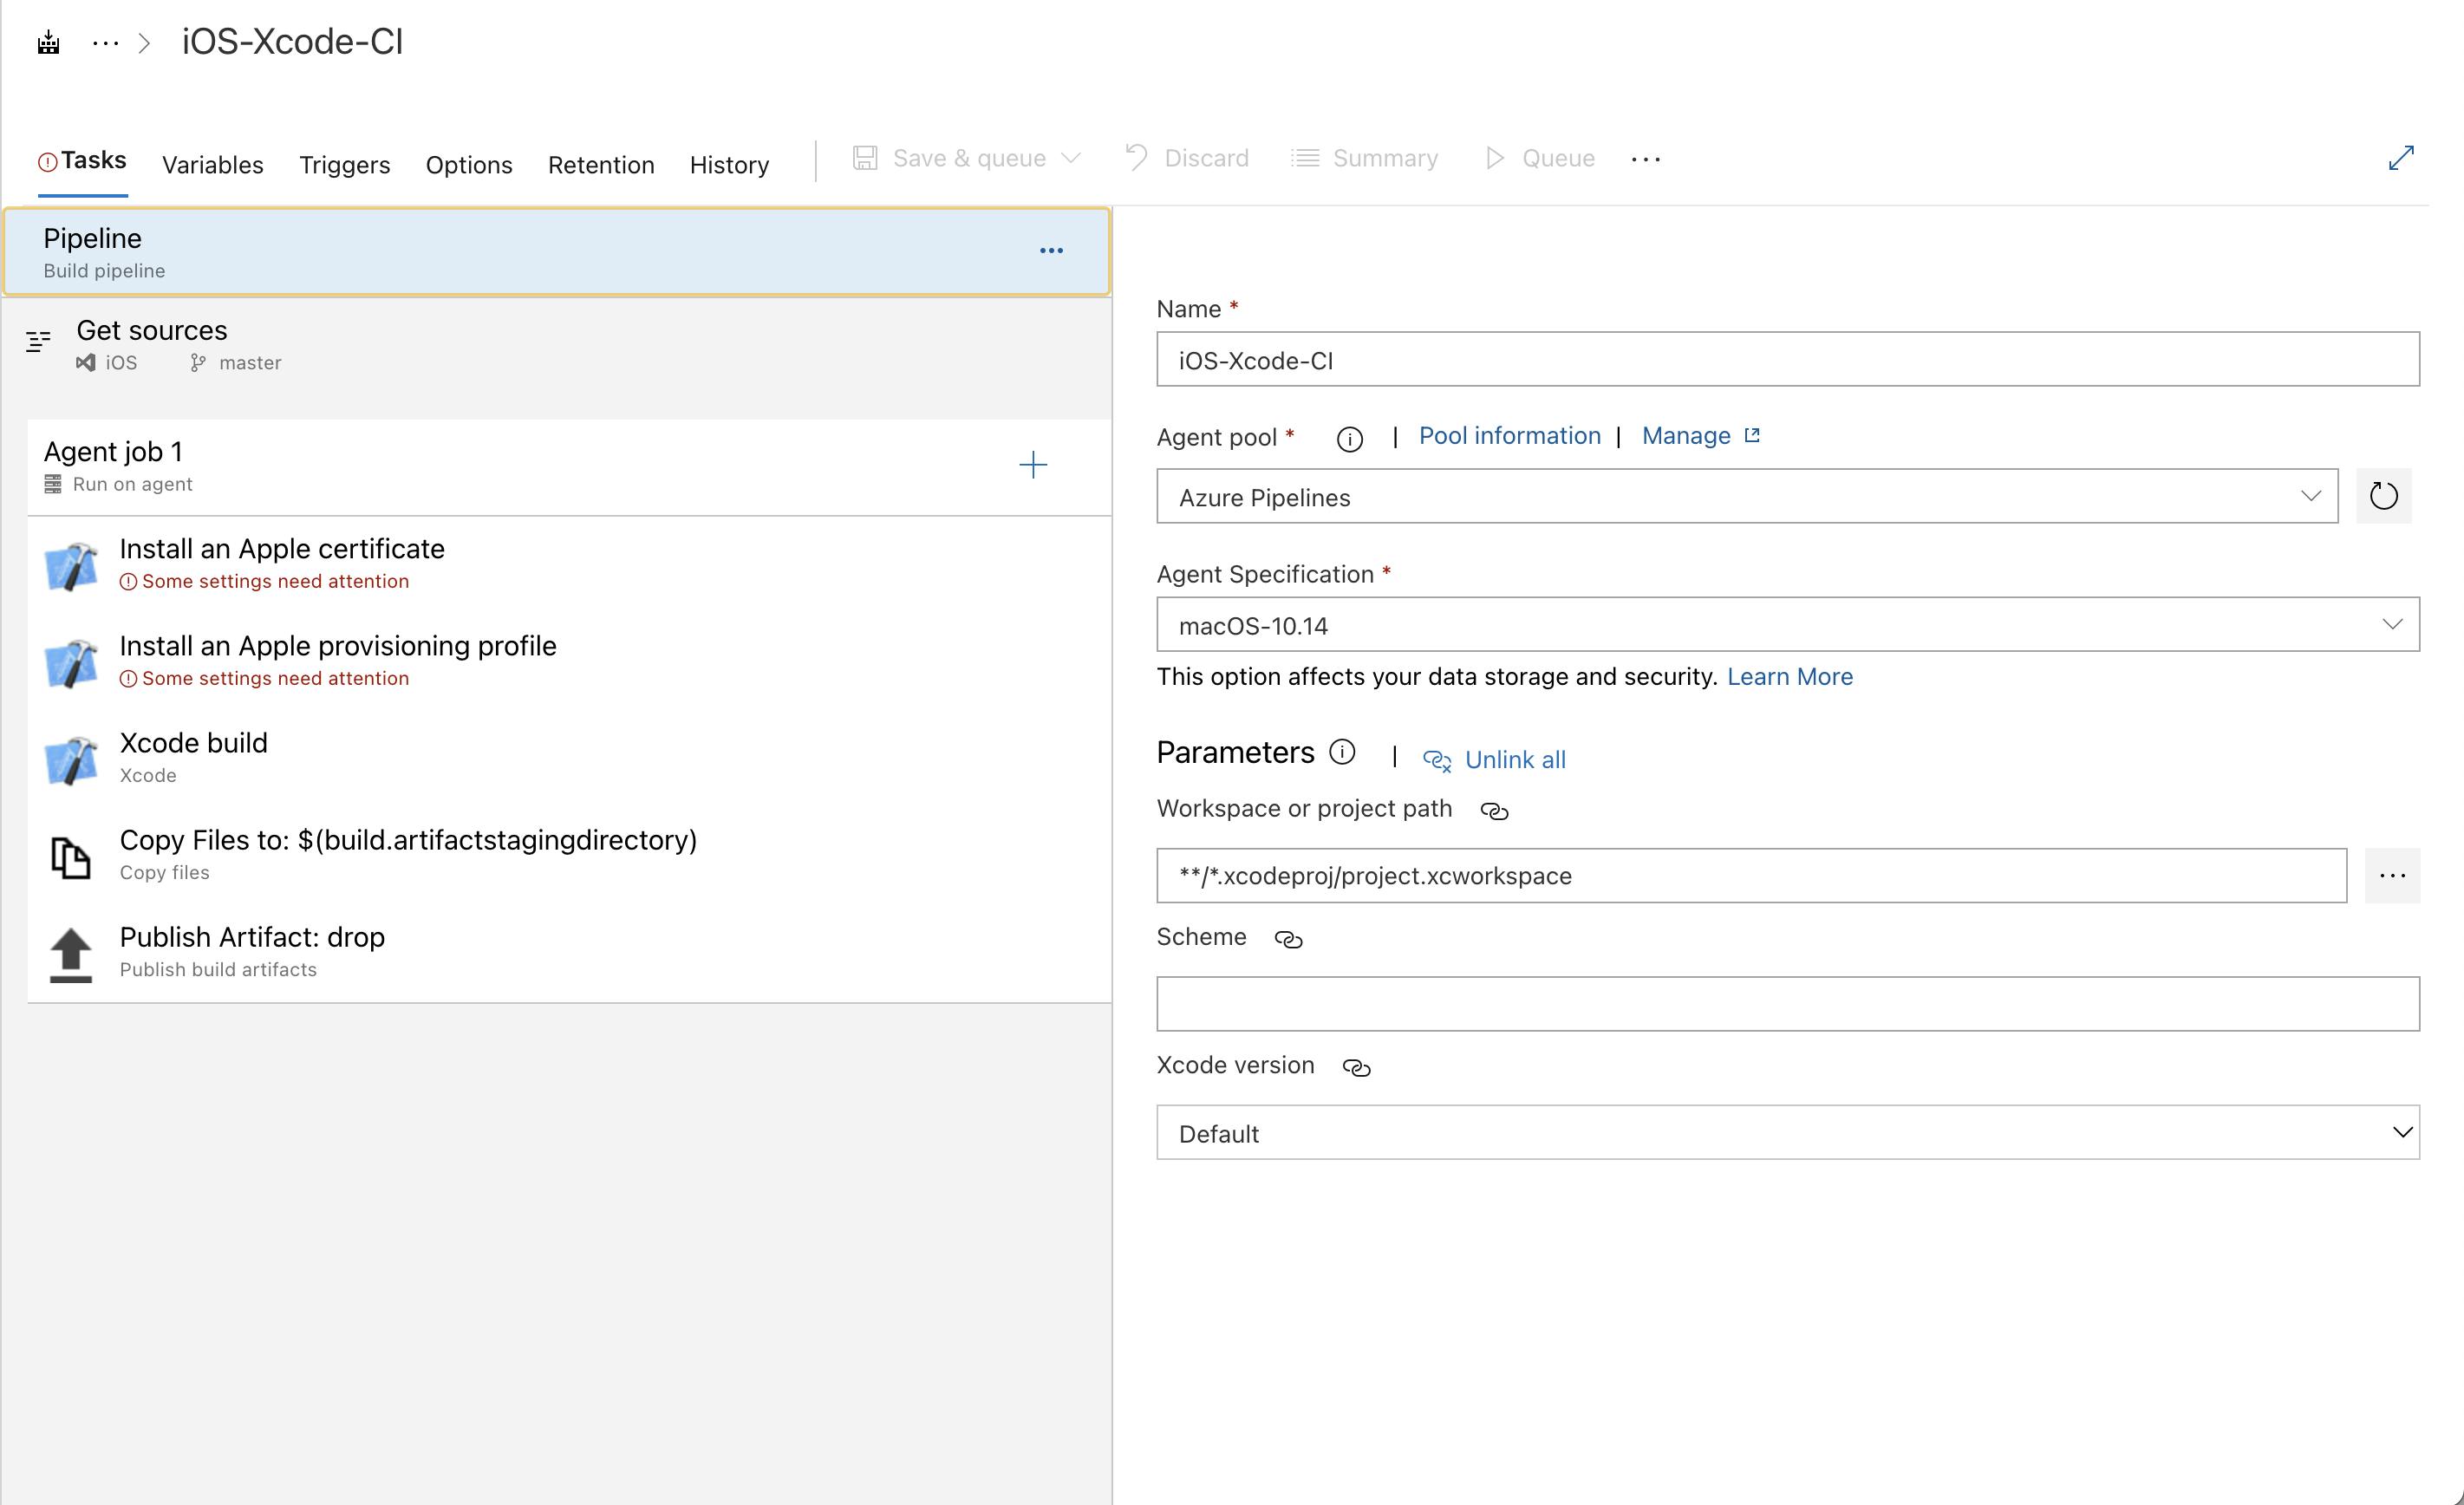
Phew! that was a long process. Okay, going back to DevOps let's upload the files to their respective tasks. Select the "Install an Apple Certificate" task and click on the gear icon on the right besides the "Certificate (P12)" field. It will ask you to upload the p12 file which we generated above. Once set it will look like below.

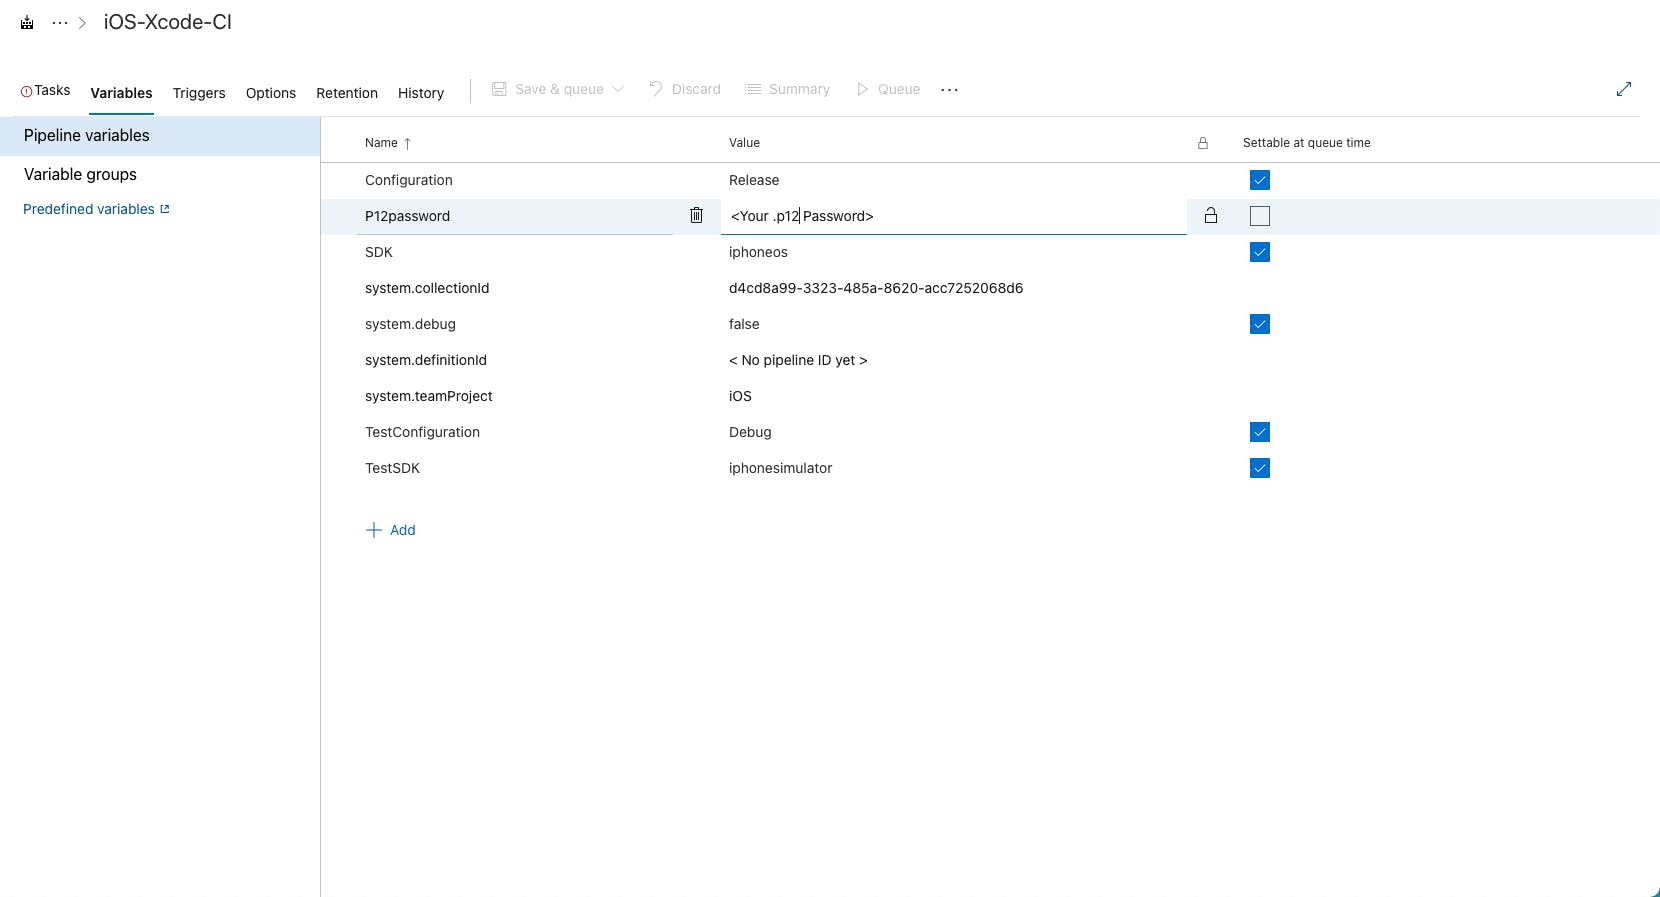
Select "Variables" from the top tabs. The variables really come in handy when you want to store keys, secrets or passwords securely. There will already be an entry for your P12password variable. Enter your password in Value and make sure to lock the icon so that you or other people cannot see it once you save the build.
Time to add the provisioning profile. Go back to tasks tab and select "Install an Apple provisioning profile task". Upload your provisioning profile which will now remove any error.

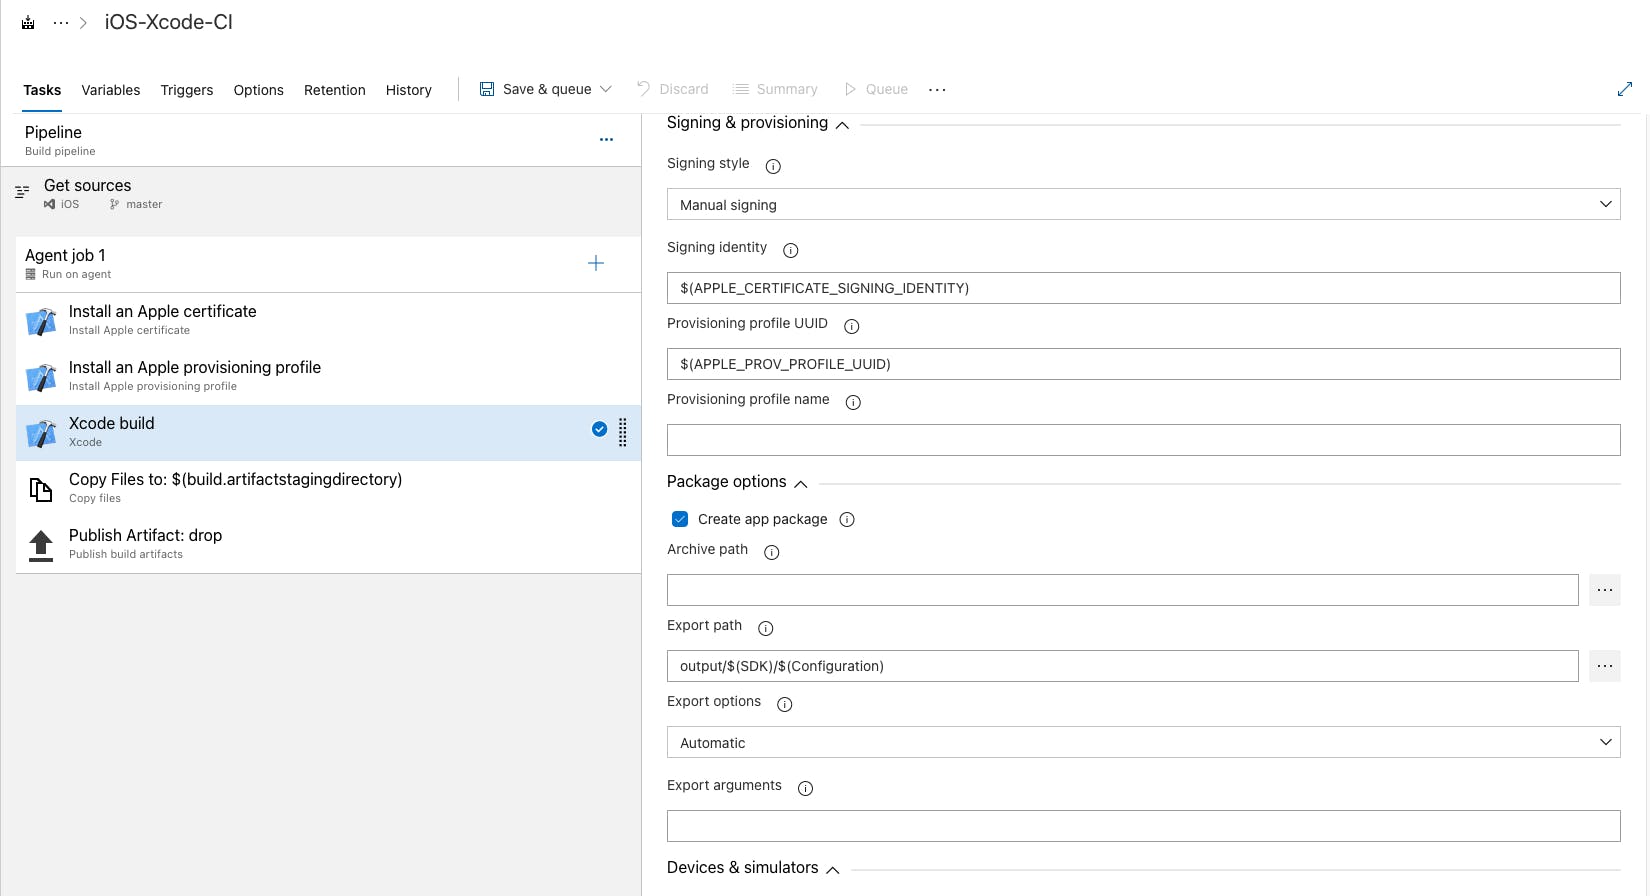
Since we want to sign the build we need to tell the "Xcode build" task to manually sign it using the certificate and provisioning profile we just uploaded. In order to do so select the "Xcode build" task and select "Manual Signing" under "Signing & Provisioning". This will display 3 fields. Enter $(APPLE_CERTIFICATE_SIGNING_IDENTITY) in "Signing Identity" field and $(APPLE_PROV_PROFILE_UUID) in Provisioning Profile UUID field. Finally select the checkbox "Create app package".
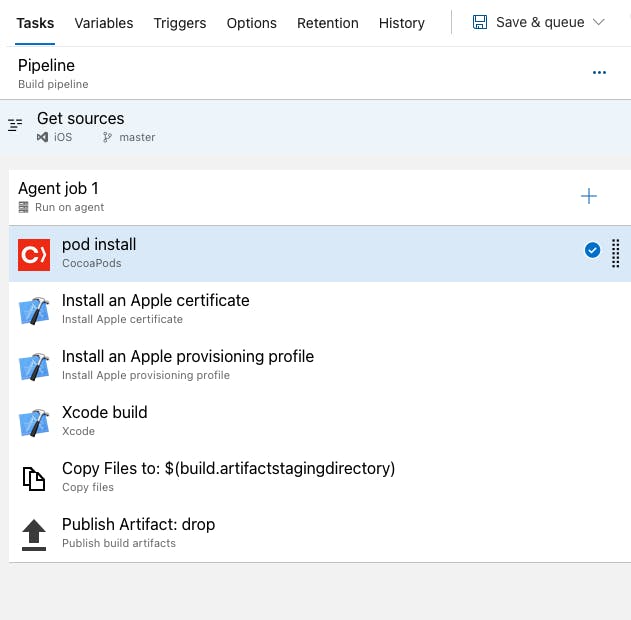
Lastly if you are using pods in your project you need to add a CocoaPods task in your pipeline on top. Select the + icon besides "Agent Job 1" to add a new task. Search for CocoaPods and click Add. Drag the task above "Install an Apple Certificate" so that it is the first task that is being executed.
You can now save and queue your build by clicking "Save & queue" button. Make sure to select Mac OS in the Agent Specification other wise it will give an error.
In the next part we will have a look at how to setup Continuous Deployment to the TestFlight using release pipelines.